


A trading card wall display can be a cheap weekend project, a traditional framing job or a large piece of custom interior display work. The right approach depends on what kind of trading cards you own, what holders they are in, how large the collection is and how much of the building process you actually want to do yourself.
If you are trying to work out how to make a trading card display, how to build your own trading card frame, or whether a homemade trading card display is realistic for your collection, this guide covers the main decisions before you start cutting materials.
This is the broad planning guide for the whole project. It covers raw trading cards, sleeves, top loaders, magnetic holders, graded slabs, timber, MDF, resin, aluminium, matboard, EVA foam, acrylic, glass, UV protection, lighting, frame depth, backing, wall mounting and large-format layouts. Use it to work out the construction approach first, then move into the game- or collection-specific choices that matter to you.
Start with the holder, not the frame
The most useful rule in the entire project is simple: design around the thing that will actually sit inside the display.
A raw trading card is thin and vulnerable to direct contact. A sleeved trading card is slightly larger and may need room for the sleeve edge. A top loader is rigid and much thicker. A magnetic holder can vary substantially in depth. A graded slab adds weight, a label and its own outer dimensions.
If you start by buying the outer frame, you may discover later that the internal depth is wrong, the holder cannot sit flat or the opening proportions make the collection look awkward.
Raw trading cards
Raw trading cards are the simplest physically, but they need careful handling because there is no rigid holder protecting the surface and edges. Avoid adhesives directly on valuable trading cards. A sleeve, matboard opening or removable support should hold the trading card without creating permanent contact.
Raw trading cards are ideal for shallow displays because the material stack can stay thin. They are also easier to arrange in large visual groups because the outer dimensions are small.
Sleeved trading cards
For a more detailed guide focused specifically on raw trading cards, penny sleeves, perfect-fit sleeves and premium sleeves, see our How to Make a Raw & Sleeved Trading Card Wall Display.
Sleeves add protection and are often the easiest route for a DIY display. The important detail is to build around the actual sleeve. Penny sleeves, perfect-fit sleeves and premium deck sleeves can have different outside dimensions and stiffness.
If the display uses matboard, test the opening with the exact sleeve before cutting the full panel.
Top loaders and semi-rigid holders
Top loaders are inexpensive, easy to source and useful when a collector wants rigid protection without grading. They need more depth than a sleeve and may look better when the insert hides part of the plastic border.
Semi-rigid holders behave differently because they flex. If the frame relies on friction to hold them, make sure the pressure does not bow the holder or make removal difficult.
Magnetic holders and One Touch-style cases
For a dedicated guide to magnetic holders, holder depth, EVA foam and DIY One Touch wall displays, see our How to Make a One Touch Trading Card Wall Display.
Magnetic holders are particularly popular for premium raw trading cards and sports trading cards. They present the trading card cleanly and are available for different card thicknesses.
Do not assume every magnetic holder has the same depth. Thick memorabilia trading cards can require much deeper cases than standard trading cards. The outer frame should be planned around the thickest holder that will actually be displayed.
Graded slabs
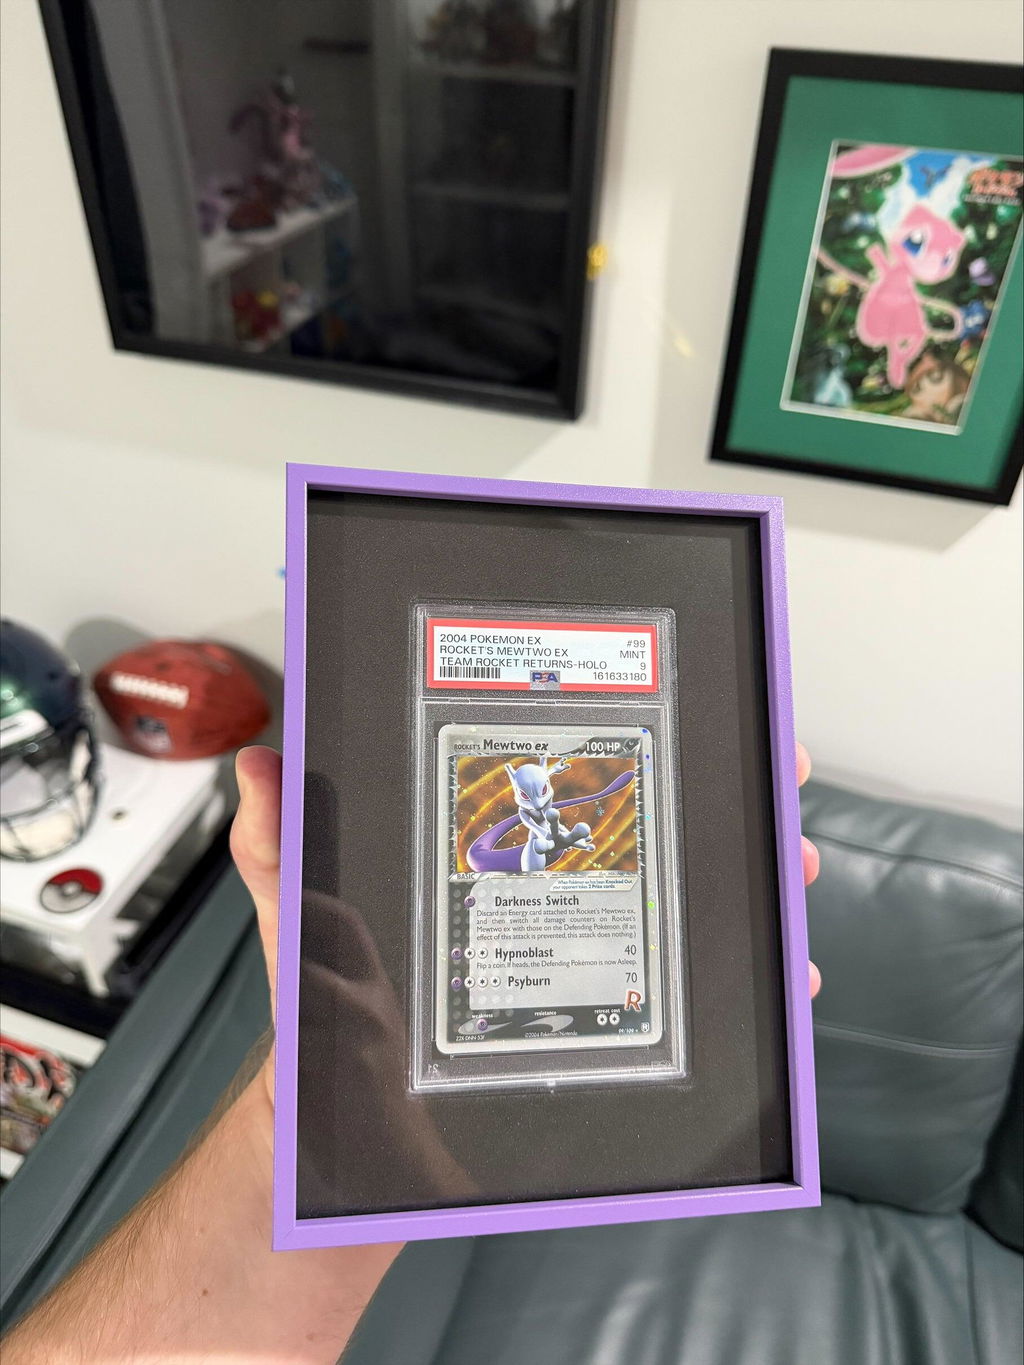
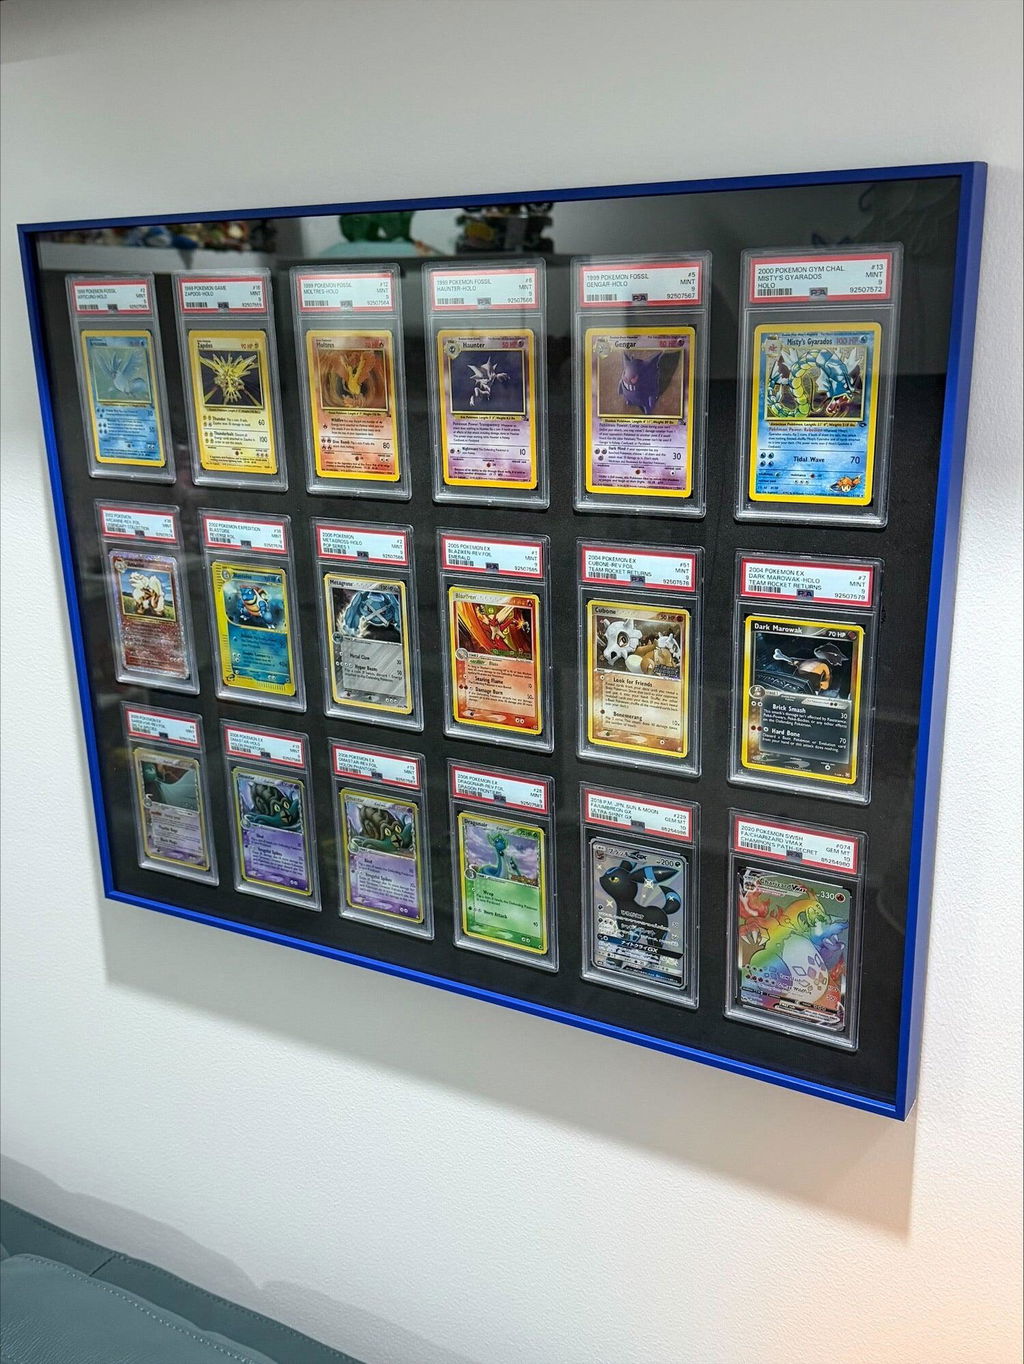
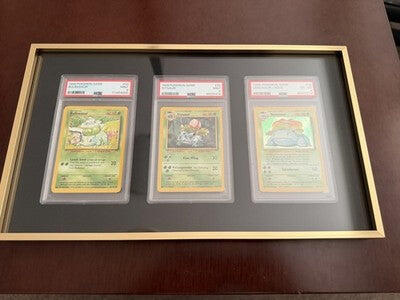
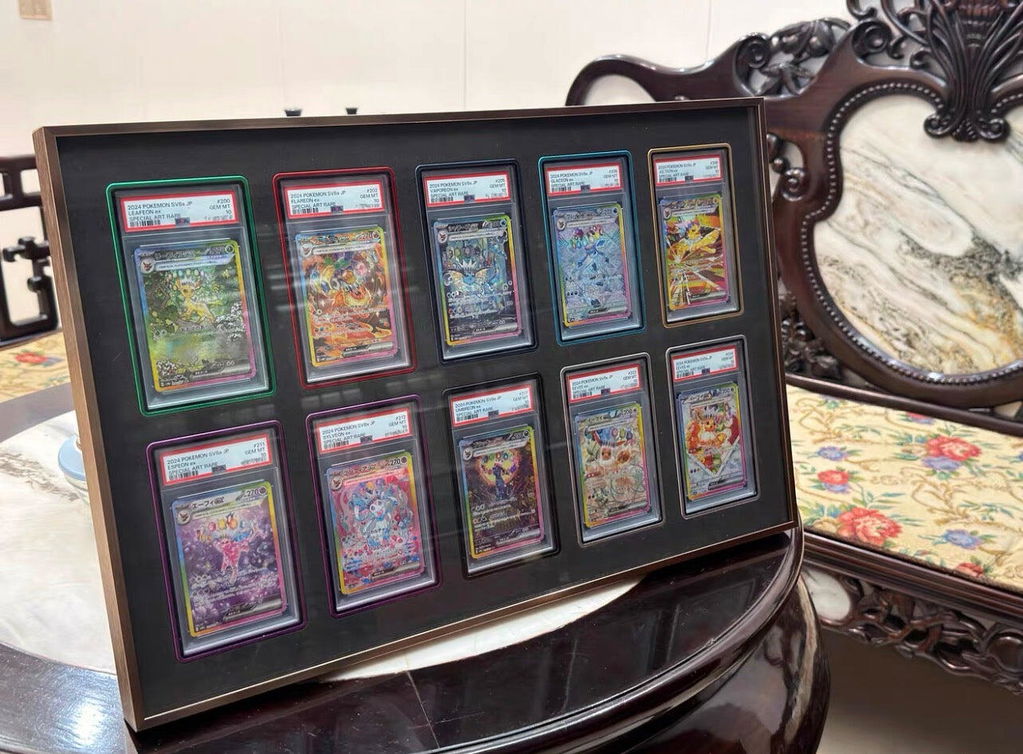
Graded trading card displays are built around the slab rather than the raw trading card. PSA, CGC, BGS and other grading holders differ in outer size, thickness, label proportions and edge profile.
Mixed-slab displays are possible, but the visible faces may not line up perfectly. A collector should decide whether that variation is part of the look or whether separate modules would be cleaner.
Measure the actual holders you own and prototype the fit before cutting a full insert. A slab opening that works for one holder type should not be assumed to fit another.
Choosing a frame material without making the project harder than it needs to be
The outer frame changes the look of the whole display, but it also affects weight, depth, rigidity and how easy the build will be. A material that works beautifully for a nine-trading-card display may become awkward once the same idea is stretched across a much larger wall.
Solid wood
Solid wood is a good choice when you want a warmer, more traditional finish and you are comfortable doing basic cutting, sanding and joining. It can be painted or stained, and deeper timber profiles can make it easier to create room for rigid holders. The main trade-off is weight. A large solid-wood frame can become heavy before the acrylic, backing and trading cards are even added.
MDF
MDF is one of the easiest materials to use for a budget DIY frame. It is flat, cheap, easy to cut and simple to paint. That makes it useful for prototypes or for collectors who would rather spend money on glazing and mounting than on the outer frame. The downside is that raw edges need finishing, moisture resistance varies, and big MDF frames can be heavier than they look.
Acrylic
Acrylic can be used as the glazing, the backing, or even as a visible structural part of a display. It gives a clean modern look and is much lighter than an equivalent sheet of glass. Local plastics suppliers can often cut it to size, which saves a lot of frustration. The main weaknesses are scratching and flex. Protective film should usually stay on until late in the build, and larger sheets need more support than smaller ones.
Resin
Resin is the least conventional option, but it can work well for decorative surrounds, moulded details or unusual finishes. It is much more labour intensive because mould preparation, curing, bubbles, sanding and finishing all have to be managed. For most people it is a design-led choice rather than the easiest route to a clean trading card wall display.
Aluminium
Aluminium suits collectors who want a slim, modern frame with good rigidity. It works especially well visually on larger grids because the frame can stay relatively restrained while the trading cards remain the focus. Fabricating an accurate aluminium system from scratch is more involved than working with timber or MDF, so many collectors who prefer that look use a ready-made aluminium trading card display rather than building the metal structure themselves. Premium aluminium display systems have become more common in Western markets as collectors have looked for cleaner, more permanent ways to present larger collections.
The important point is not that one material is universally better. It is that every material solves a slightly different problem. Choose based on the size of the display, the tools you already have, the look you want and how much time you actually want to spend building it.
How to choose between matboard and EVA foam
Matboard and EVA foam solve different problems.
Matboard is best when the trading card or sleeve is thin and the goal is a traditional framed look. It creates a clean visual opening and can be layered for different colours.
EVA foam is better suited to rigid holders because the material can support the outside shape of a slab or magnetic case. A foam opening can hold the holder level without visible clips.
If a display mixes raw trading cards and slabs, separate zones or separate frames are usually easier than forcing both formats into one insert material.
Matboard, EVA foam and the part that actually holds the trading cards
The insert is where a normal picture frame starts becoming a trading card display. The outer frame can be beautiful, but if the insert does not keep the trading cards or holders straight, the finished result will still look wrong.
Matboard for raw and sleeved trading cards
Matboard works particularly well when the trading cards are raw or sleeved. It gives a clean border, can be cut with a bevel and is available in a wide range of colours and textures. A single mat gives a simple finish, while a double mat can introduce a second colour without overwhelming the trading card artwork.
The opening should position the trading card without squeezing its edges or forcing the sleeve to bow. Test one opening first. It is much easier to correct one test cut than an entire multi-opening panel.
EVA foam for slabs and rigid holders
EVA foam is useful when the trading card is already inside a rigid slab or magnetic holder. It is lightweight, can be precision cut and can support the outside shape of the holder without requiring clips or visible brackets around every trading card.
Density matters. Foam that is too soft may allow a slab to tilt or move. Foam that is too firm can make the holder unnecessarily difficult to insert or remove. The aim is a snug fit rather than maximum friction. The holder should sit securely and stay level when the display is vertical, but it should still be removable without excessive force.
Foam thickness also affects where the face of the holder sits relative to the glazing. If the recess is too deep, the trading card can look buried. If it is too shallow, the holder may sit too close to the front acrylic. This is why a dry fit matters before the whole display is assembled.
Black EVA tends to disappear visually around darker frames and can make panel joins less obvious. White EVA creates a brighter presentation but will usually show small inconsistencies more clearly. Neither is automatically better. The surrounding frame, wall colour and trading card artwork should decide it.
For very large displays, one insert panel can become difficult to handle. Multiple sections can be used, but the visual spacing across a join needs to stay consistent with the rest of the display. The goal is for the eye to read one continuous grid rather than a collection of separate foam panels.
Measuring without giving yourself a precision problem
Measure width, height and depth. Look at corner shape. Check label areas. If possible, measure several examples of the same holder rather than designing the whole frame around one sample.
The right opening depends on the material. Matboard may overlap the edge of a sleeve. EVA may use controlled friction. Acrylic channels generally need clearance rather than compression. A fit that works in one material should not automatically be copied into another.
Layout planning: where small errors become obvious
A small display can survive a little improvisation. A large trading card grid cannot. Once an alignment error is repeated across many rows or columns, the eye notices it even if nobody can immediately explain what looks wrong.
The key variables are the number of rows, number of columns, holder orientation, spacing, outer margins and the overall proportion of the display. Choose a spacing system that works visually for the holders in front of you and repeat it accurately.
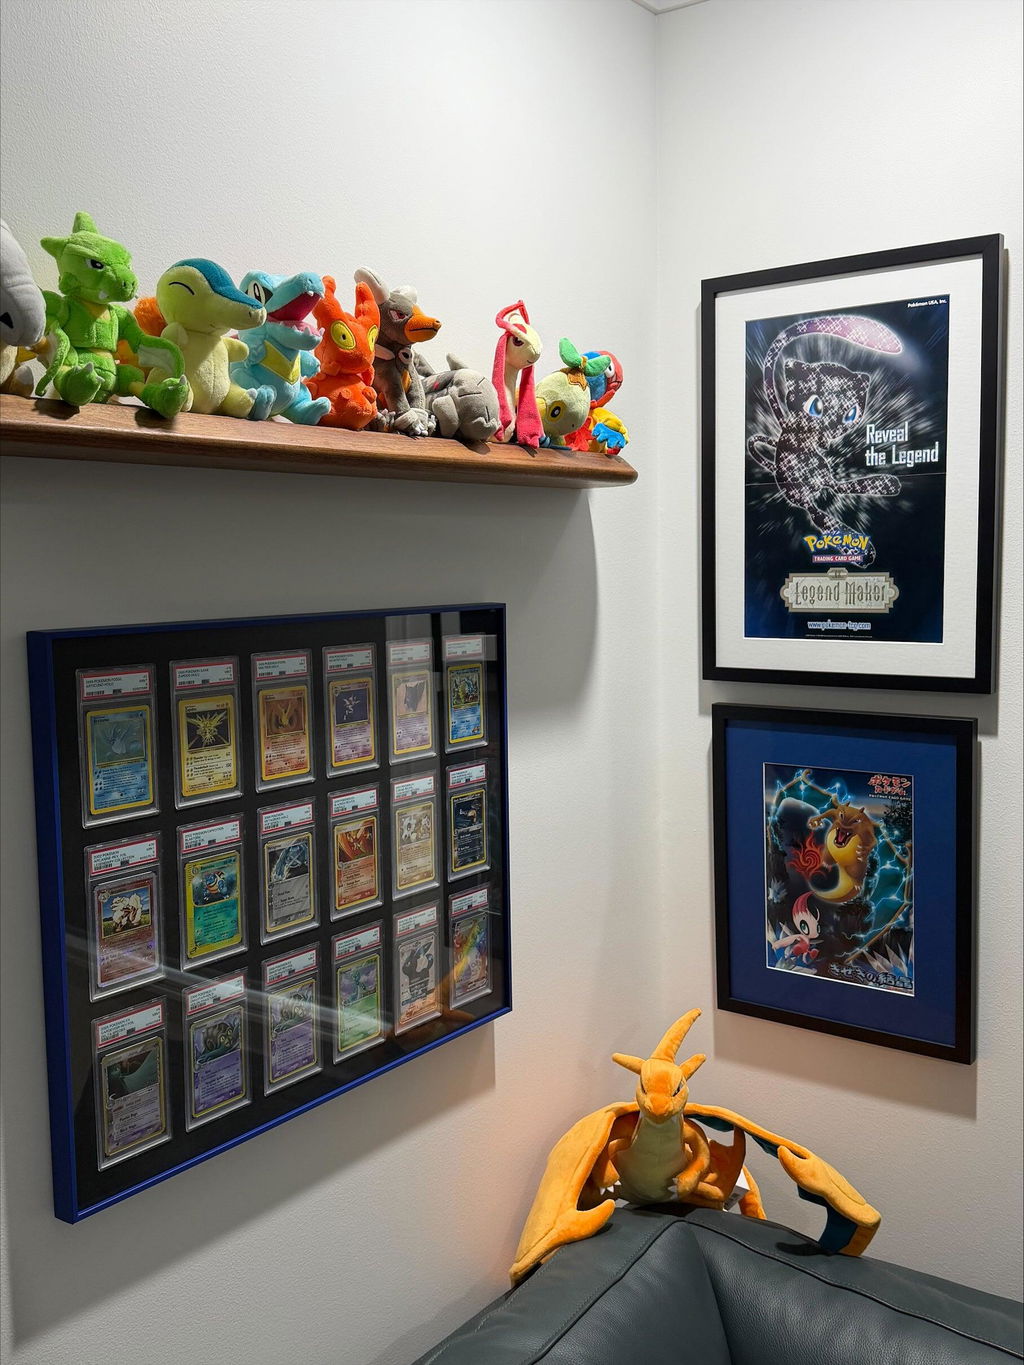
Mock up the overall size on the wall before cutting anything. Painter's tape is useful because a width that looks reasonable on a screen can feel enormous once it is physically marked out in the room. The larger the display, the more important it becomes to think about the wall as part of the design rather than as an empty surface that will somehow accommodate the finished frame.
Outer margins deserve the same attention as the spacing between trading cards. Equal margins create a restrained grid. Larger outer margins create more breathing room. The important thing is that the result looks intentional.
Grid layouts, modular walls and asymmetrical displays
Perfect grids are popular because they make repeated holder shapes look clean. They are not the only option.
A centrepiece trading card can anchor an asymmetrical layout. Landscape sports trading cards can occupy a dedicated row. Raw trading cards and graded trading cards can be separated into zones. Several smaller frames can be arranged as one wall composition.
The important thing is that the layout looks intentional. Random inconsistency is what usually makes a display feel unfinished.
Pokémon, MTG, Yu-Gi-Oh!, One Piece, Lorcana and sports trading cards all create slightly different problems
Pokémon collections often use strong visual themes such as evolution lines, one character across multiple artworks or mixed Japanese and English trading cards. MTG collections may be built around a Commander deck, artist, colour identity or full-art lands. Yu-Gi-Oh! uses a smaller raw trading card format, so generic openings designed for standard-size TCGs can look oversized.
One Piece and Lorcana trading cards are often very art-focused, which makes glare control and restrained framing important. Sports trading cards introduce the widest variety of thickness and orientation because patch trading cards, memorabilia trading cards and magnetic holders can be much deeper than standard cards.
The construction principles are shared, but the collection itself should decide where the emphasis goes.
Acrylic, glass and UV protection
The front of the display has several jobs at once. It keeps dust away from the trading cards, protects the holders from casual contact and affects how much the whole frame weighs. It also changes how the display behaves under room lighting.
Acrylic or glass?
Glass is hard, scratch resistant and familiar from traditional framing. It can also offer excellent optical clarity and strong UV filtration when specialist products are used. The problem is weight and breakage. Those issues are minor on a small frame and much more important on a large wall display.
Acrylic is lighter and much more impact resistant. It is often the more practical option once a display becomes wide or contains many trading cards. The compromise is that acrylic scratches more easily and can flex over larger spans. It should be cleaned with products and cloths suitable for acrylic rather than aggressive household cleaners.
UV protection is not one single level
“UV resistant” and “museum-grade UV protection” are not the same thing. Different acrylic and glass products filter different amounts of ultraviolet light, and the best choice depends heavily on where the display will live.
A display on an interior wall that never receives direct sun does not create the same risk as a display opposite a bright window. In a low-exposure room, standard UV-resistant glazing and sensible placement may be a better use of money than paying for the most expensive specialist glass. In a high-exposure room with valuable trading cards, stronger UV filtering can make much more sense.
The cheapest UV solution is often better room placement. No glazing should be treated as permission to leave valuable trading cards in strong direct sunlight indefinitely.
Acrylic thickness and large spans
There is no single acrylic thickness that is correct for every display. A small panel supported around all edges behaves differently from a very wide sheet with a large unsupported span.
As displays grow, rigidity matters more. Thicker acrylic can reduce flex but also adds cost and weight. A local plastics supplier can recommend a suitable thickness for the span and support method you are planning, which is more useful than copying a number from somebody else's frame.
Lighting without turning the glazing into a mirror
LED lighting can make foil, texture and colour look excellent, but it can also make a trading card display frustrating if reflections are not controlled. The easiest mistake is fixing the lights first and only discovering the glare problem after the display is on the wall.
Common approaches include top lighting, side lighting, LED strips around the inside edge, backlighting and external spotlights. Each changes the way the trading cards and glazing reflect light. Test the final acrylic or glass, holder and light source together before permanently fixing anything.
Think about colour temperature, diffusion, hotspots, cable routing, power-supply access and heat. LEDs are generally efficient, but a sealed frame should still avoid trapping unnecessary heat around valuable trading cards. A diffuser can make a cheap LED strip look much more even and prevent individual light points from reflecting across glossy slabs.
Frame depth is one of the easiest things to get wrong
The visible trading card is only one layer. The finished stack can include glazing, an air gap, the trading card holder, matboard or EVA foam, a backing panel, lighting channels and removable hardware.
Dry-stack the materials before finalising the outer frame. This one step can prevent a lot of frustration.
Backing options
Common backing materials include MDF, hardboard, plywood, acrylic, foam board and aluminium composite panel. Small displays can use relatively simple backing. Large displays need more attention to flatness and rigidity because a flexible centre can allow the insert to move even if the outer frame is strong.
Keeping trading cards replaceable
Collections change. A trading card gets upgraded, sold or replaced. A new release changes the theme. A collector changes grading company.
Plan access from the beginning. Screwed backing panels, removable retainers and other serviceable methods can all work. Secure does not need to mean permanent.
Frame depth, backing and wall mounting
Frame depth is easy to underestimate because the visible trading card is only one layer in the finished display. A build may include front glazing, an air gap, a rigid holder, EVA foam or matboard, a backing panel and possibly lighting or removable access hardware.
Dry-stack the materials on a table before finalising the outer frame. A frame that looks deep enough on a product page may not be deep enough once a slab and insert are actually sitting inside it.
Backing materials can include MDF, plywood, hardboard, foam board, acrylic or aluminium composite panel. The larger the display becomes, the more important flatness and rigidity are. A flexible backing can allow the centre of a large insert to move even if the outer frame is solid.
Wall mounting should be planned after the finished weight is understood. Plasterboard, timber studs, brick and concrete all need different fixing methods. Local hardware stores are a better place to match anchors and fasteners to the actual wall than copying a generic mounting list online. Very large displays often benefit from multiple mounting points so the load is distributed rather than concentrated in one place.
Also think about access. Collections change. A trading card gets upgraded, sold or replaced. A display that takes an hour to reopen will become annoying. Secure does not have to mean permanent.
Where to source materials for a DIY build
Most of the materials needed for a home trading card display can be sourced locally. That is usually the easiest route because local suppliers can answer questions about thickness, cutting, mounting and safe handling.
- Hardware stores for timber, MDF, tools, screws, anchors and general mounting hardware.
- Picture-framing suppliers for matboard, frame moulding, specialist glass and framing hardware.
- Plastics and acrylic suppliers for cut acrylic panels and advice on suitable sheet thickness.
- Timber merchants for better-quality solid wood.
- Foam suppliers for EVA and other insert materials.
- Glass suppliers for custom glazing and higher-grade UV options.
- Art and craft stores for matboard, cutting tools and smaller prototype materials.
- Sign-making material suppliers for rigid plastic panels, foam boards and composite sheets.
For a one-off build, paying a local supplier to make an accurate cut can be cheaper and safer than buying a specialist tool that will only be used once.
Cheap, mid-range and premium ways to approach the build
A cheap DIY trading card display does not automatically mean a bad one. The trick is to save money in places that do not create a problem somewhere else.
Cheap DIY approach
A standard picture frame, MDF or foam-board backing, simple matboard and basic acrylic can work well for a small raw-trading-card display. The main limitations are usually frame depth, finish and rigidity. Cheap ready-made frames can be excellent for thin trading cards and completely unsuitable for thick slabs.
Mid-range approach
Better timber moulding, custom-cut acrylic, quality matboard or EVA foam, stronger backing and proper mounting hardware can make a large difference without moving into specialist fabrication. This is often the sweet spot for people who enjoy DIY but still want the finished display to feel intentional.
Premium DIY approach
A premium build might use solid wood, aluminium components, higher-grade UV glazing, dense EVA foam, custom matboard, integrated lighting and professional wall mounting. At this point the cost of labour and tools can become as important as the materials. Some collectors still enjoy the process; others decide they would rather buy a ready-made display and spend their time on the collection itself.
Large-format trading card displays
A large display creates problems that barely exist in a small frame: total weight, acrylic flex, backing rigidity, panel handling, transport, insert joins, wall loading and access.
One giant display can create a dramatic uninterrupted wall. Several smaller displays are easier to move, mount, reopen and expand. Neither approach is automatically better.
When a modular wall is the smarter option
Modular displays are particularly useful for collections that are still growing. A collector can add another matching frame later rather than rebuilding a single large display.
The main downside is alignment between separate frames. Use a level, consistent gaps and a repeatable mounting method if several modules are intended to read as one wall.
Cheap DIY trading card display ideas
A basic picture frame, simple acrylic, matboard and a rigid backing can be enough for a small raw-trading-card display. A shadow box can work for thicker holders if the internal depth is suitable.
The best way to save money is to keep the design simple. Complicated lighting, unnecessary decorative materials and specialist hardware can quickly cost more than the frame itself.
Premium DIY trading card display ideas
A premium build can use solid wood, aluminium, specialist UV glazing, dense EVA foam, integrated lighting and professional wall mounting. At this level, precision and labour become part of the cost.
That does not make premium DIY pointless. Some people enjoy the project. Others reach the point where a ready-made system is more attractive because they care more about the finished wall than the fabrication process.
Build a decision tree before you buy anything
A lot of DIY trading card display frustration comes from buying attractive materials too early. A better approach is to make a short decision tree before spending money.
Start with the holder. If the trading cards are raw or sleeved, matboard and a shallow frame may be enough. If they are in top loaders or magnetic holders, you need more depth. If they are graded slabs, you need a rigid-holder insert, stronger backing and a mounting plan that accounts for the extra weight.
Then decide the scale. A small display can use materials that would flex or become too heavy in a large display. A large display needs more attention to glazing span, backing rigidity, wall hardware and transport.
Finally decide whether the build itself is part of the hobby. If you enjoy woodworking, cutting matboard and experimenting with lighting, DIY can be rewarding. If you mainly want a finished wall, every extra fabrication step has a time cost as well as a material cost.
Compare holder types before choosing the insert
| Holder type | Typical DIY challenge | Insert approach | Main thing to watch |
|---|---|---|---|
| Raw trading card | Protecting edges and surface | Matboard or removable support | No direct adhesive contact |
| Sleeved trading card | Sleeve dimensions and movement | Matboard | Build around the actual sleeve |
| Top loader | Extra depth and plastic border | Foam, matboard or recessed support | Do not squeeze the holder |
| Magnetic holder | Different holder thicknesses | EVA or rigid recess | Measure the exact holder profile |
| Graded slab | Weight, label alignment and varying slab dimensions | EVA foam or custom rigid insert | Prototype before cutting the full panel |
Think of the insert as a mechanical part, not decoration
The insert is doing real work. It positions the trading card, controls movement, sets the visible depth and helps the entire display look square once gravity is acting on it.
That means material behaviour matters. Matboard is rigid and thin. EVA foam compresses. Foam board is light but less durable. Acrylic is rigid but needs clearance rather than friction. A design that works in one material cannot simply be copied into another without testing.
For rigid holders, the best fit is usually one that supports the holder consistently around its outer shape. If the fit depends on one tiny pressure point, the holder can twist or tilt. If the fit is loose everywhere, gravity will expose the error as soon as the frame goes vertical.
Prototype before committing to the full panel
A small test piece can save hours of work. Cut one representative opening in the actual insert material, place the real holder into it and test the fit in both horizontal and vertical positions.
Check insertion, removal, visible border, depth and movement. If the build uses several holder types, test each one independently.
Do not treat the prototype as wasted material. It is part of the build process and usually costs far less than remaking a finished panel.
Room assessment: the wall is part of the system
Before building the frame, look at the wall where it will live. Measure the usable area, note power points, windows, doors, shelving and furniture, and observe where direct sunlight falls throughout the day.
A display can be technically excellent and still feel wrong because it is too large for the wall, too high to view comfortably or constantly covered in window reflections.
Painter's tape is one of the cheapest planning tools available. Mark the outside boundary of the proposed display and live with it for a day or two before cutting anything. If the frame will sit beside a jersey, shelf or monitor, mark those relationships too.
Viewing distance changes what matters
At close range, the eye notices individual trading card art, grading labels and small alignment differences. At several metres away, the wall becomes a pattern of rows, colour and frame proportion.
This is why a large display should be judged from both distances. A layout can look precise on a workbench but feel too dense from across the room. Conversely, a layout with very wide spacing may look elegant close up but strangely empty at normal viewing distance.
Visual hierarchy: not every trading card needs equal emphasis
A grid is not the only way to organise a collection. A centrepiece trading card can anchor the wall. A row of landscape sports trading cards can create a deliberate break. Premium trading cards can have more breathing room than supporting pieces.
Hierarchy is especially useful when a collection contains several holder types or visual themes. Instead of pretending everything is identical, the layout can acknowledge the differences and use them intentionally.
Large panels behave differently from small panels
As acrylic, backing and inserts become larger, flex and handling become more important. A sheet that feels rigid in a small sample may behave very differently over a wide span.
Large panels are also harder to move through doors, carry upstairs and mount safely. The physical path from the workbench to the wall should be considered before the frame is finished.
If one panel becomes impractical, modular construction can solve several problems at once: transport, expansion, replacement and mounting load.
Split inserts and multi-panel displays
Very large inserts can be made from more than one section. The challenge is not the existence of a join; it is whether the join interrupts the visual rhythm.
Place joins where the layout naturally creates separation and keep the spacing on both sides visually consistent. Darker insert materials can hide joins more easily, while bright materials tend to make them more obvious.
The goal is not to pretend the display is physically one piece. The goal is to make the collection read as one composition.
Plan transport before the frame is finished
A wall display that is easy to assemble on a workshop table may be awkward to carry once the glazing and backing are installed. Consider door widths, stairs, vehicle space and whether the finished display can be safely lifted by one person.
For very large displays, it can be smarter to transport the frame, insert and trading cards separately and complete final assembly near the wall. That reduces the risk of putting heavy loads through the insert while the display is being carried at unusual angles.
Do not confuse premium materials with good design
Expensive materials cannot rescue poor layout. A perfectly cut MDF frame with clean spacing can look better than a costly timber frame with uneven openings and bad proportions.
Spend first on the parts that affect the result most: accurate cutting, appropriate glazing, stable support and proper wall mounting. Decorative upgrades should come after the structure works.
Where a cheap build can save money safely
Budget choices are easiest when they do not compromise the trading card holder or wall safety. A simple painted MDF outer frame can be perfectly adequate. A basic neutral matboard can look clean. Standard UV-resistant acrylic may make sense in a room with little direct sunlight.
Saving money on the wrong thing can create problems. Very weak backing, unsuitable wall fixings or an insert that does not support the holder properly can affect the entire display.
When higher-grade glazing is worth the cost
Higher-grade UV filtering becomes more relevant when the trading cards are valuable, the room receives significant natural light, or the display is expected to remain in place for many years.
It is less compelling when the wall is deep inside a room, direct sunlight never reaches it and the collection is rotated frequently. The correct choice is about exposure and value, not simply buying the most expensive option available.
Managing heat, humidity and moisture
A wall display is not a climate-controlled vault. Normal indoor conditions are generally the goal, but avoid mounting valuable trading cards directly beside strong heat sources or in areas with persistent moisture.
Bathrooms, damp basements and walls with known condensation problems are poor choices. Integrated lighting should also avoid creating unnecessary heat inside a sealed cavity.
If the room itself has a humidity problem, solve that before expecting a frame to compensate for it.
Static, dust and acrylic
Acrylic can attract dust through static, particularly when protective film is removed. Assemble the display in a clean area and remove dust before closing the backing.
Use acrylic-safe cleaning products and soft cloths. Aggressive glass cleaners and abrasive wiping can leave haze or fine scratches that become obvious under lighting.
Mixed-format collections need zones
A wall containing raw trading cards, slabs and magnetic holders is easier to design when each format has its own visual zone. Trying to force every holder into identical openings usually creates unnecessary compromises.
Separate modules with matching outer frames can create a unified wall while allowing each holder type to use the insert and depth it actually needs.
Designing for collection growth
Ask whether the collection is complete, slowly evolving or rapidly expanding. That answer should influence the structure.
A completed vintage run can justify a fixed one-piece display. A modern TCG collection may be better served by repeated modules. A player collection can leave room for future seasons. A Commander display may need easy access because individual trading cards change regularly.
Designing for growth does not mean leaving awkward empty spaces. It means choosing a system that can be extended without starting again.
Project scenario: a small raw trading card display
For a small group of raw or sleeved trading cards, keep the build simple. Use a locally sourced frame, matboard, acrylic or glass and a removable backing. The main work is accurate mat cutting and sensible wall placement.
This is the kind of project where DIY offers excellent value because specialist structural materials are unnecessary.
Project scenario: a medium graded trading card display
A medium slab display introduces more depth and weight. EVA foam or another rigid-holder insert becomes useful, acrylic often makes sense for weight control, and the backing should stay flat across the whole frame.
At this size, prototyping the slab fit becomes important because repeating a poor opening across many positions is expensive and frustrating.
Project scenario: a large mixed trading card wall
A large mixed collection is usually easier to solve as several coordinated displays than one universal frame. Raw trading cards can use matboard, slabs can use EVA, and thick sports trading card holders can use deeper modules.
Matching the outer frame colour or material can make the wall feel unified even when the internal construction differs.
Project scenario: an illuminated feature wall
An illuminated trading card wall needs the lighting plan before final assembly. Test reflections, diffusion, cable exits and power-supply access while the frame is still easy to modify.
Do not bury a power component behind a sealed backing if it may need replacement later. Lighting should remain serviceable just like the trading cards.
How to judge whether the DIY project is getting too complicated
Complexity usually appears gradually. One custom frame becomes custom acrylic, then a precision foam insert, then integrated LEDs, then specialist mounting. None of those steps is unreasonable, but together they can turn a simple weekend build into a serious fabrication project.
Stop occasionally and ask whether you still want to build the display or whether you simply want the finished result. That decision can save both money and time.
Maintenance schedule for a finished trading card display
There is no need for constant maintenance. A sensible routine is enough:
- Dust the glazing with an appropriate soft cloth.
- Check large frames occasionally for movement or sagging.
- Inspect mounting hardware after relocation or major wall vibration.
- Open the display only when trading cards need to be changed.
- Check that no holder has shifted inside the insert.
- Keep direct sunlight and persistent moisture under control.
A well-built display should spend most of its life simply hanging on the wall.
A final pre-build checklist
- Have you chosen the exact trading card holder format?
- Have you measured real examples of the holder?
- Have you mocked up the overall frame size on the wall?
- Have you decided whether the collection will expand?
- Have you chosen an insert material suited to the holder?
- Have you tested one opening?
- Have you checked the full material stack for depth?
- Have you considered glare and direct sunlight?
- Have you chosen glazing suitable for the display size?
- Can the frame be reopened later?
- Can the finished display be safely transported and lifted?
- Do you know what wall type you are mounting into?
- Have you chosen mounting hardware for the finished weight?
If those questions have clear answers, most of the difficult decisions are already made.
Common DIY mistakes that are easy to avoid
- Measuring the raw trading card instead of the holder that will actually go into the display.
- Choosing the outer frame before checking the full material stack and required depth.
- Assuming every graded slab or magnetic holder uses the same outside dimensions.
- Cutting every opening before testing one.
- Making foam openings so tight that holders are difficult to remove.
- Making openings so loose that slabs rotate or sag when the display is vertical.
- Using inconsistent spacing across a large grid.
- Leaving the outer margins to whatever space happens to remain.
- Choosing glazing without considering the final span, weight and room lighting.
- Assuming UV-resistant glazing makes direct sunlight harmless.
- Using adhesive in direct contact with valuable trading cards.
- Building a sealed frame that is almost impossible to reopen.
- Ignoring future collection growth.
- Forgetting that the completed display still needs to be carried, lifted and mounted safely.
A practical build sequence
- Decide which trading card holder format you will display.
- Measure actual examples of that holder.
- Choose how many trading cards you want to display.
- Mock up the overall size on the wall.
- Choose the grid or layout.
- Select the outer frame material.
- Select the insert material.
- Choose acrylic or glass.
- Plan the backing and how the display will reopen later.
- Dry-stack the materials to confirm the required depth.
- Prototype one holder opening before cutting the full panel.
- Dry-fit the frame, glazing, insert and backing.
- Install the trading cards or holders.
- Close the display and check alignment while it is vertical.
- Select wall hardware based on the completed display and wall type.
- Mount the display level and recheck the trading card alignment.
When DIY makes sense and when ready-made starts looking attractive
DIY makes a lot of sense when the build itself is part of the hobby. If you already own tools, want an unusual shape, enjoy experimenting with materials or are working with a small display, building it yourself can be satisfying and inexpensive.
Ready-made systems become more attractive as the display gets larger, the holders need a precise fit or the project starts requiring custom acrylic, foam cutting, stronger backing and complicated wall mounting. There is nothing wrong with reaching the point where the time required to build the frame is worth more to you than the frame itself.
The useful question is not “which option is better?” It is “do I want to build the display, or do I mainly want the finished wall?”
How to make a trading card display at home
If you want to make your own trading card frame, the simplest route is usually to start small. Choose one holder type, measure it, decide the layout, then source the frame, insert, glazing and backing locally.
A homemade trading card display does not need to imitate a commercial system. A cheap DIY build can use a standard frame, matboard and acrylic. A premium homemade display can add custom-cut glazing, EVA foam, solid timber or aluminium, improved UV protection and professional mounting.
The more holder types and the larger the grid, the more the project shifts from simple framing into precision fabrication. That is the point where some collectors keep building and others decide a ready-made display is the better use of time.
DIY trading card frame ideas by budget
Cheap: standard picture frame, simple matboard, basic acrylic and a removable backing for a small raw or sleeved collection.
Mid-range: custom-cut acrylic, better timber moulding, EVA foam or more precise matboard, stronger backing and upgraded wall hardware.
Premium: solid timber or aluminium, specialist UV glazing, denser inserts, integrated lighting and professional mounting for larger or more permanent displays.
Frequently asked questions
What is the easiest way to make a trading card wall display?
For a small raw or sleeved collection, a standard frame with custom matboard and acrylic is one of the simplest approaches.
What is the best material for a trading card frame?
There is no single best material. Timber and MDF are easier for DIY work, acrylic is useful for glazing and modern builds, resin is decorative, and aluminium suits slim rigid larger displays.
Is EVA foam good for graded trading cards?
Yes. EVA can support slabs and magnetic holders well when the density, thickness and opening fit are tested.
Is acrylic better than glass for large trading card displays?
Acrylic is often more practical because it is lighter and impact resistant. Glass is more scratch resistant and can offer excellent optical quality.
Do trading card displays need UV protection?
UV protection is useful, but room placement matters just as much. Avoid prolonged direct sunlight even with UV-resistant glazing.
Can you mix PSA, CGC and BGS slabs in one display?
Yes, but the holders differ in dimensions and label proportions. Measure the actual slabs and decide whether the visual variation works for the layout.
Can you mix raw trading cards and graded trading cards in one frame?
You can, although separate zones or separate frames are usually easier because the required depths are very different.
How do you stop trading card holders moving inside a frame?
Use an insert that supports the outside of the holder consistently. EVA foam is one option for rigid holders; matboard works better for raw or sleeved trading cards.
How do you make a cheap trading card display look better?
Prioritise accurate spacing, clean cuts, sensible margins and good wall placement. Precision usually matters more visually than expensive materials.
Should a large trading card display be one frame or several?
One large frame gives a continuous look, while several smaller frames are easier to transport, mount and expand. Choose based on the wall and how likely the collection is to change.
More specific DIY trading card display guides
If you already know what kind of collection you are building around, the specialist guides go deeper into the display problems that are unique to each category:
- Pokémon trading card wall displays
- MTG trading card wall displays
- Yu-Gi-Oh! trading card wall displays
- One Piece trading card wall displays
- Sports trading card wall displays
- Lorcana trading card wall displays
- Graded trading card wall displays
- Raw & sleeved trading card wall displays
- One Touch magnetic-holder trading card wall displays
Final thoughts
A trading card wall display is a simple idea with a surprising number of variables once the collection grows. The easiest way to keep the project manageable is to make decisions in the right order: holder first, layout second, materials third, frame depth after that, and wall mounting once the finished weight is understood.
There is no requirement to make the most complicated display possible. A cheap frame with clean spacing can look excellent. A premium aluminium or solid-wood display can make sense for a much larger collection. The right build is the one that protects the trading cards, suits the room and matches how much of the project you actually want to build yourself.
Continue Exploring
If you enjoyed this guide, you may also find these collector resources helpful.
📚 Collector Guides
-
Best Trading Cards to Display & Collect
Explore Pokémon, MTG, Yu-Gi-Oh!, Sports Cards, One Piece and Disney Lorcana cards, sets, rarities and collection ideas. -
The Ultimate Trading Card Display Guide
Explore trading card wall displays, frames, shelves, layouts and display solutions for collections of every size. -
How to Display Graded Cards on a Wall
Learn how collectors display PSA, BGS and CGC graded cards using wall-mounted trading card displays.
🛒 Shop Display Collections
-
Aluminium Trading Card Wall Display Frames
Premium aluminium trading card display frames available in a wide range of grid sizes, frame colours and holder formats. -
PSA, CGC & BGS Graded Slab Wall Display Frames
Purpose-built graded trading card display frames for Pokémon, MTG, Yu-Gi-Oh!, One Piece, Sports Cards, Disney Lorcana and other collections. -
One Touch Wall Display Frames
Premium aluminium wall display frames designed for One Touch magnetic trading card holders.

0 comments