


Building a Pokémon trading card wall display can be as simple as placing a few sleeved trading cards into a matboard frame or as involved as planning a wall-sized grid of graded slabs. The best approach depends on what you are displaying, how large the collection is, how much protection you want and whether the building process itself is part of the fun.
If you are searching for how to make a Pokémon trading card display, a DIY Pokémon trading card frame, or a homemade Pokémon card display, the same basic rule applies: start with the holder and the wall space before buying materials.
This guide focuses on Pokémon specifically. If you want a broader comparison of frame materials, holder types and build approaches across different games and sports collections, see our complete DIY trading card wall display guide.
What kind of Pokémon trading card display are you actually building?
Pokémon collections can become complicated quickly because the same wall may eventually contain raw trading cards, sleeved trading cards, top loaders, PSA slabs, CGC slabs, BGS slabs and magnetic holders. The first job is to decide what format the display is really being designed around.
A raw trading card needs gentle support and protection from direct contact. A slab needs depth, rigidity and an insert that holds the outside of the holder. A mixed display can work, but it needs to look intentional rather than like several different storage systems were forced into one frame.
Pokémon collectors also tend to build around themes. One display might follow a single Pokémon across different artworks, another might show an evolution line, and another might simply be a wall of favourite graded trading cards. The build should support that collecting idea rather than dictate it.
Choosing a frame material without making the project harder than it needs to be
Pokémon displays can go in very different directions visually. A small group of raw trading cards can suit a simple timber picture frame, while a wall of graded slabs usually benefits from something cleaner and more rigid. The frame material should follow the scale of the collection rather than the other way around.
Timber is forgiving and easy to work with if you are building at home. MDF is cheaper and useful when the frame will be painted. Acrylic can keep the overall look light, although larger sheets need proper support and careful cleaning. Resin is better suited to decorative one-off builds than large, precise grids.
Aluminium makes sense when you want a slim, modern border around a larger collection. It is strong for its weight and does not visually compete with colourful Pokémon artwork, but accurate metal fabrication is a more involved DIY project than cutting timber or MDF. If the aim is simply to get the aluminium look on the wall, a ready-made aluminium trading card display is usually the more practical route.
Whatever material you choose, check the finished weight before thinking about wall fixings. A frame that feels light when empty can change substantially once the glazing, backing and a large number of slabs are installed.
Raw Pokémon trading cards, sleeves, top loaders and slabs
Raw Pokémon trading cards are thin and easy to frame closely, but they should not be stuck directly to the backing. Sleeves add protection and are usually the easiest route for a simple matboard display. Top loaders create a stronger physical object and are useful for collectors who want rigid protection without grading.
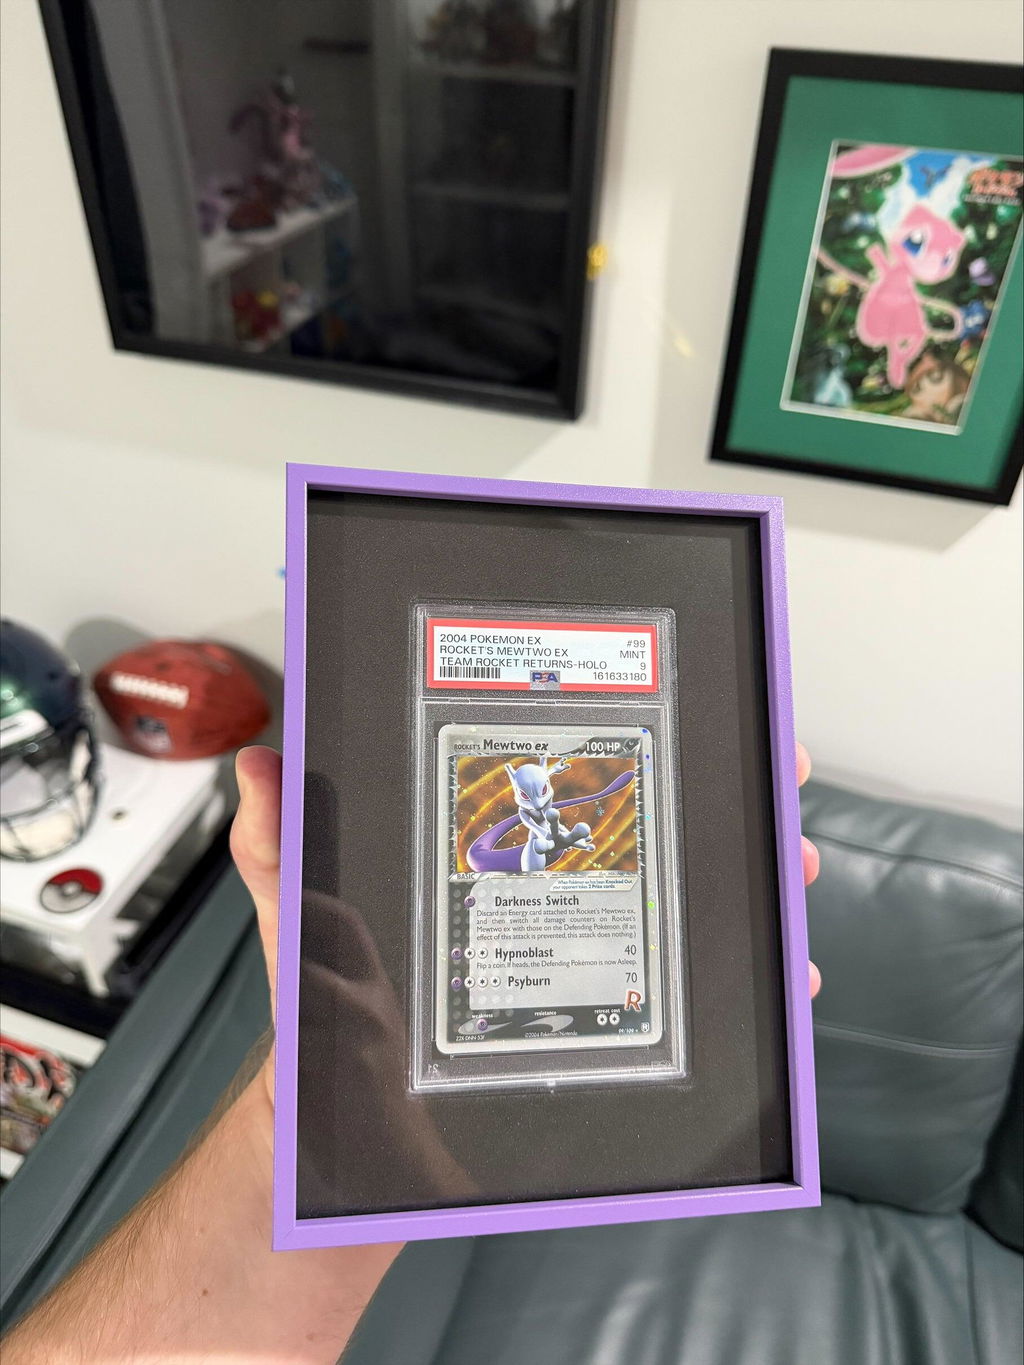
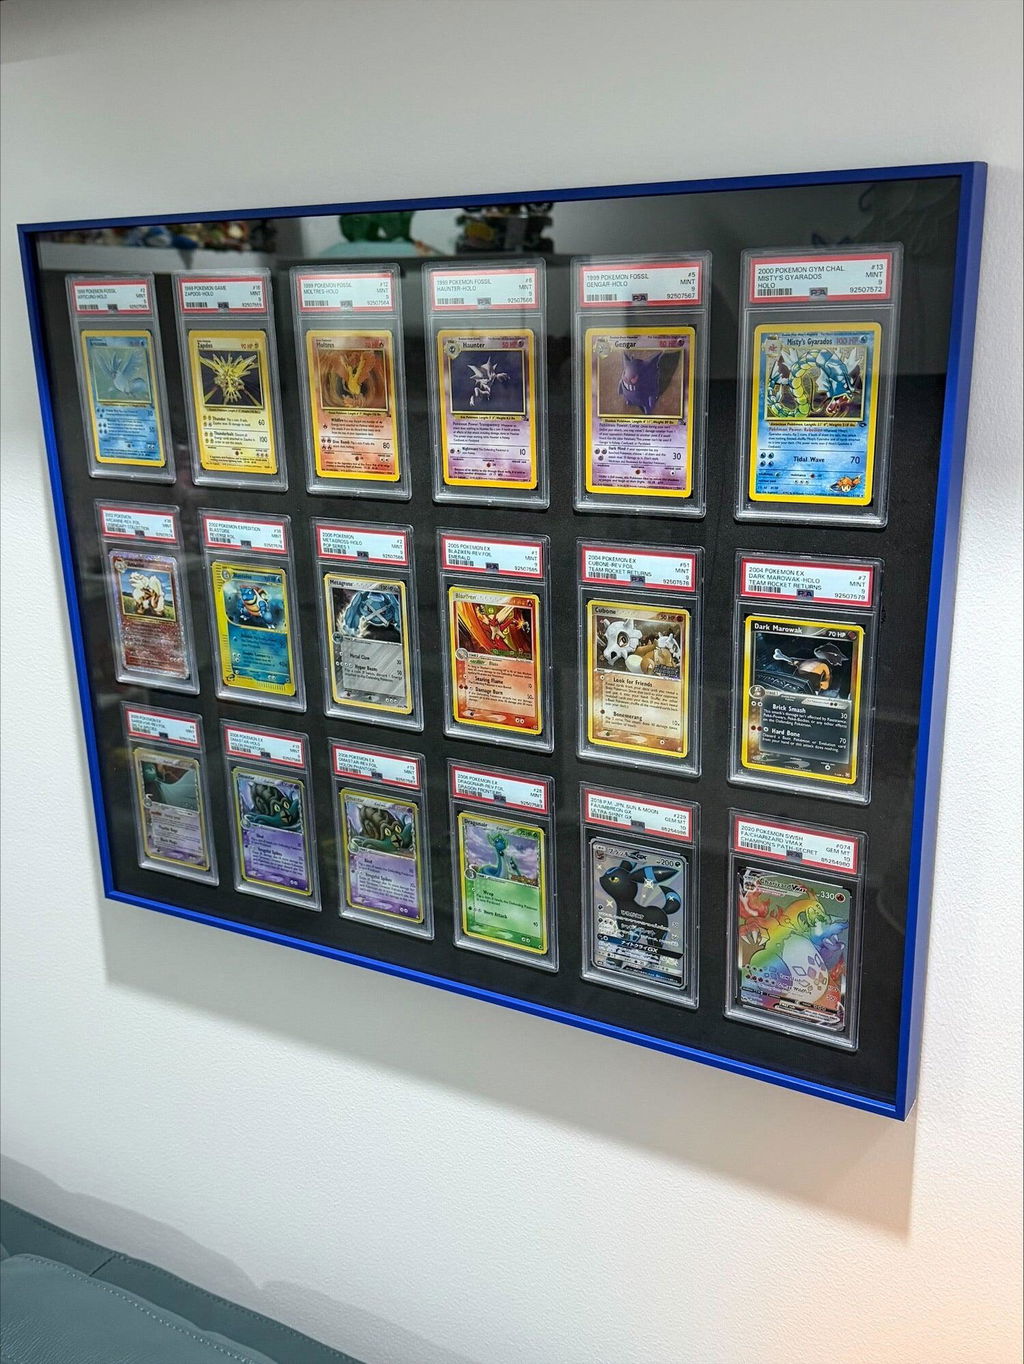
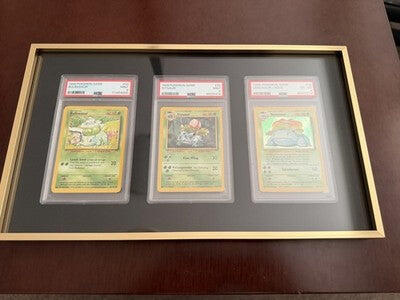
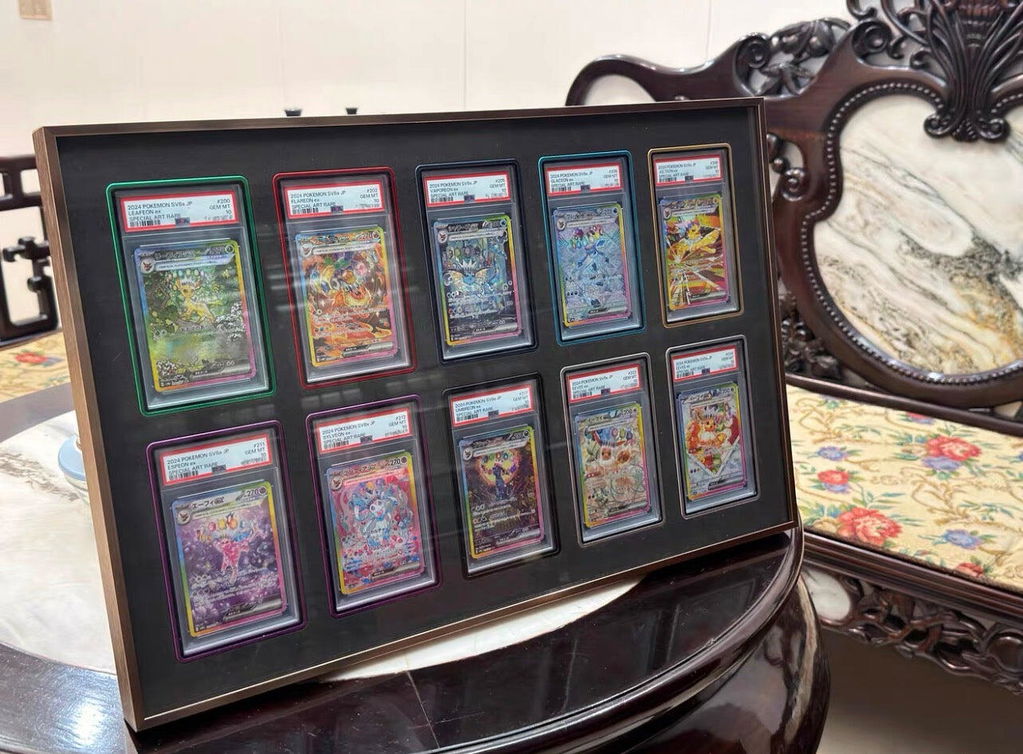
Graded Pokémon trading cards are a different build. The slab becomes the object being held. Different grading companies use different holder shapes and proportions, so a DIY builder should measure the exact holders in the collection rather than using a generic “graded trading card” opening.
If several slab types will share the same wall, consider whether they should share one frame at all. Separate frames can sometimes look cleaner than forcing different label heights and outer dimensions into one rigid grid.
Matboard, EVA foam and the part that actually holds the trading cards
For raw or sleeved Pokémon trading cards, matboard is hard to beat. It gives each trading card a clean boundary, can be cut in a single or double layer, and lets you keep the frame relatively shallow. Black-core matboard gives a darker cut edge; white-core gives a more traditional framing look. Neither is inherently better.
Graded Pokémon trading cards are different because the slab is the object that needs to be supported. EVA foam works well here because it can hold the outside of the holder without covering the label or artwork. The fit should feel secure rather than aggressive. If a slab needs to be forced into the opening, the fit is too tight for a display that may need to be updated later.
Always test one opening in spare material before committing to a full panel. That is especially important when the collection mixes grading companies or different generations of holders. Small differences that seem insignificant on one slab become obvious when they are repeated across an entire wall.
Pokémon layout ideas that work well on a wall
Pokémon trading cards are unusually suited to repeated visual themes. Evolution lines can be arranged vertically or horizontally. One Pokémon can be followed across different eras. Japanese and English trading cards can be mixed deliberately. A central favourite trading card can anchor a larger symmetrical layout.
For a colourful mixed collection, a restrained frame and insert usually work better than trying to match every colour in the artwork. The trading cards already provide plenty of visual information.
Think about growth. If the collection is still expanding, leaving room for another module or planning a layout that can be repeated later is often smarter than designing the entire wall around today's exact total.
Layout planning: where small errors become obvious
A Pokémon grid looks simple because the holders repeat, but that repetition is exactly why inconsistency stands out. If one row slowly drifts or the outside margin is visibly different on one side, the eye catches it straight away.
Start with the number of trading cards you genuinely want to display, not the largest number that can physically fit on the wall. Mark the proposed outside dimensions with painter's tape and look at it from the normal viewing distance. A layout that feels sensible on a computer screen can feel enormous once it is full size.
Then decide what the grid is trying to show. Evolution lines, one Pokémon across different artworks, Japanese and English versions, or a run of graded favourites all create different visual rhythms. Choose a consistent spacing system that suits the collection and repeat it accurately rather than copying measurements from somebody else's build.
Let the Pokémon artwork do the work
Modern Pokémon trading cards can include full-art illustrations, textured surfaces, metallic effects, darker vintage layouts and extremely bright colour. That variety is part of the appeal, but it also means the frame can become too busy if it tries to compete.
Black, white, neutral timber and restrained metal finishes are popular for a reason. They give a mixed collection one visual boundary while allowing each trading card to keep its own identity.
If you want colour in the display, use it deliberately. A thin accent mat, room lighting or a wall colour is usually easier to control than surrounding every opening with a different colour.
Acrylic, glass and UV protection
For a small Pokémon frame, both glass and acrylic are perfectly workable. Glass is harder to scratch and has the familiar feel of traditional framing. Acrylic is lighter and much more forgiving once the display gets large.
That weight difference matters on a wall of slabs. A large sheet of glass can add a surprising amount of mass before the trading cards and backing are included. Acrylic also reduces the risk associated with breakage, although it needs gentler cleaning because fine scratches show under strong light.
UV protection is worth thinking about, but the room matters as much as the glazing. A display on an interior wall away from direct sun has a very different exposure profile from one facing a bright window. Higher-grade UV filtering can make sense for valuable trading cards in a difficult location, while sensible wall placement may be the better first decision in a darker room.
Lighting without turning the glazing into a mirror
Pokémon artwork often contains foil, texture and bright colour, so it does not take much light to make the collection pop. The problem is reflections. A powerful LED strip placed too close to the front can turn the glazing into a mirror and make half the trading cards harder to see.
Test lighting with the finished holder and glazing before fixing anything permanently. Top lighting, soft external spotlights and diffused strips can all work. What matters is the viewing angle in the actual room, not how the frame looks flat on a workbench.
If LEDs are built into the display, leave a practical route for the cable and power supply. Lighting should be serviceable rather than trapped behind a backing panel that has to be dismantled every time something fails.
What changes when the Pokémon display holds dozens of trading cards?
A 50-trading-card wall display is not just a larger version of a five-trading-card frame. The glazing span grows, the backing has to stay flatter, the insert becomes harder to handle and the total weight can change the mounting method completely.
At larger sizes, modular displays deserve serious consideration. Several smaller frames are easier to carry, mount, reopen and expand. One large frame can create a cleaner uninterrupted grid, but it requires better planning from the beginning.
If a large insert needs to be made in sections, the join should fall into the rhythm of the layout rather than cutting awkwardly through one area. Darker insert materials can make joins less noticeable, but accurate alignment still matters.
Frame depth, backing and wall mounting
Depth depends on the holder format. A sleeved Pokémon trading card can sit in a relatively shallow frame. A slab or magnetic holder needs much more room once the insert, glazing and backing are included. Stack the actual materials together before the frame is finalised.
The backing needs to stay flat. On a small display, simple rigid board may be enough. On a larger slab wall, a backing panel that flexes in the centre can allow the insert to move even when the outer frame is solid.
Mounting comes last, once the completed weight is known. Plasterboard, timber studs, brick and concrete all need different hardware. For a substantial display, multiple mounting points can distribute the load and make levelling easier. A local hardware store can help match the fixing to the actual wall rather than relying on a generic online recommendation.
Where to source materials for a DIY build
You can source almost everything for a Pokémon display locally. Hardware stores are useful for timber, MDF, tools and mounting hardware. Picture framers can supply matboard, moulding and specialist glazing. Plastics suppliers can cut acrylic accurately, while foam suppliers can help with EVA.
For a one-off project, paying a local supplier to make a clean cut is often cheaper than buying a specialist tool you may never use again. It also gives you someone to ask about material thickness, safe handling and the size of panel you are planning to use.
Cheap, mid-range and premium ways to approach the build
A budget Pokémon display can still look excellent. A standard frame, clean matboard and basic acrylic can be enough for a small group of raw or sleeved trading cards. The most important thing is accuracy, not expensive materials.
A mid-range build might step up to custom-cut acrylic, better timber moulding, a purpose-cut EVA insert and stronger backing. That is where the frame starts feeling made for the collection rather than adapted from a normal picture frame.
At the premium end, collectors may look at aluminium, specialist UV glazing, integrated lighting and professional mounting. Once the project reaches that point, it is worth comparing the cost of the materials and your time with a ready-made display system.
Cheap Pokémon trading card display ideas that still look deliberate
A simple DIY Pokémon trading card display does not need to imitate a premium custom frame. A standard timber or MDF frame, basic acrylic and a clean matboard opening can work well for a small group of raw or sleeved trading cards.
For graded trading cards, a deeper shadow-box-style frame can be a good starting point if the internal depth is suitable. The key is to avoid buying the frame first and discovering later that the slabs cannot sit properly inside it.
Spend money where it changes the result. Better glazing may matter more than expensive timber. Accurate cutting may matter more than decorative hardware. A cheap frame with clean spacing can look better than a costly frame with poor alignment.
Planning a Pokémon trading card display around the room, not just the collection
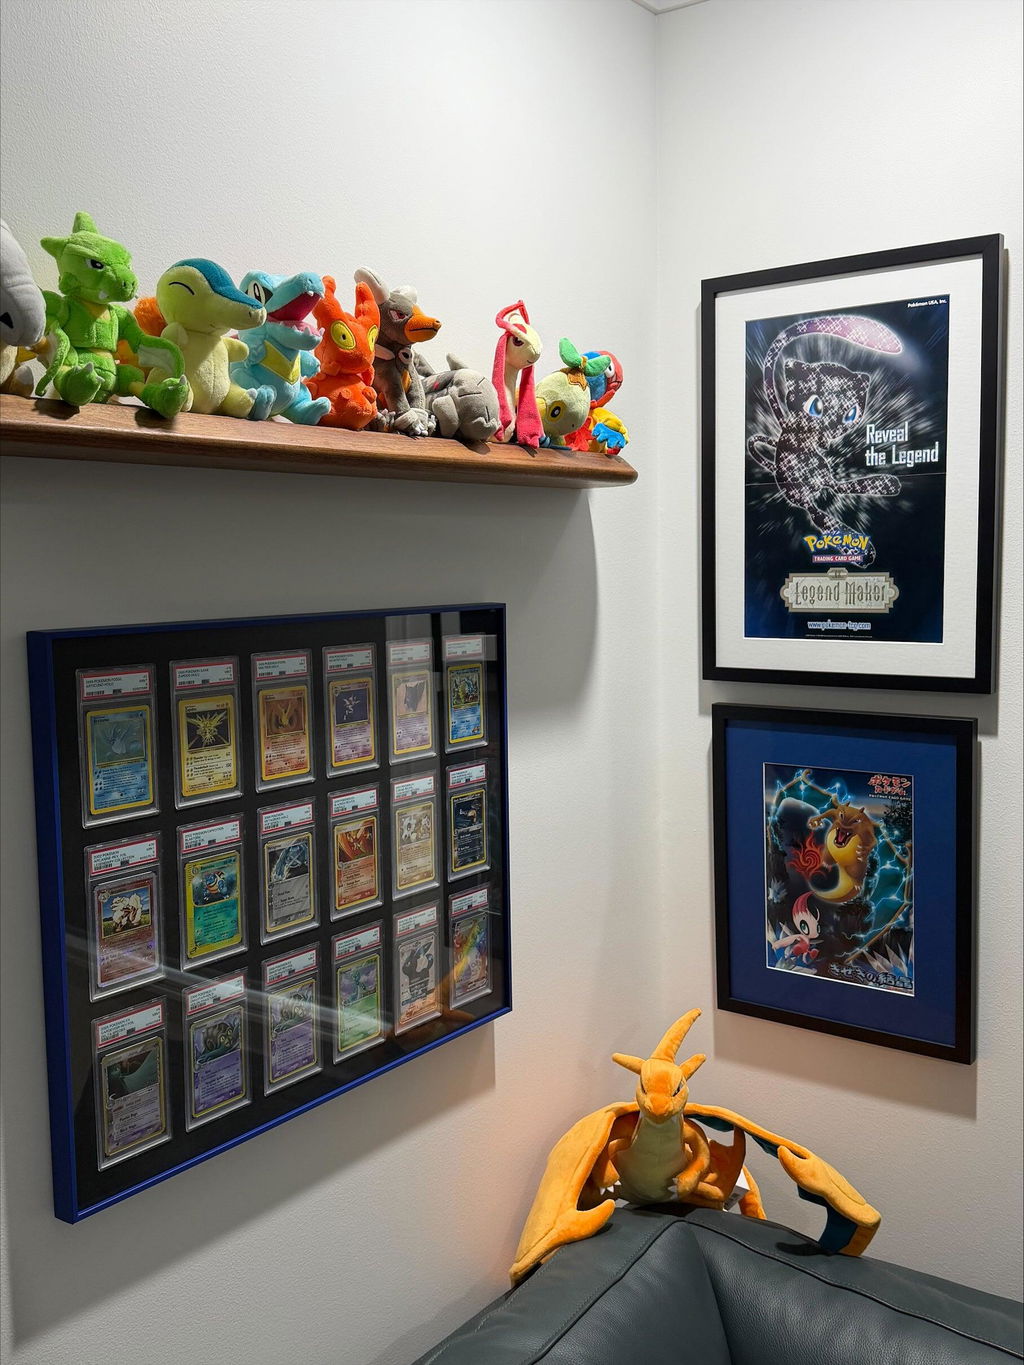
Pokémon trading card displays tend to become focal points because the artwork is bright and immediately recognisable. That means wall colour, nearby furniture and the amount of natural light in the room can affect the finished result more than expected.
A dark wall can make white or light EVA stand out strongly. A pale wall can make a black frame feel sharper. Timber can soften a room that already contains a lot of black electronics or shelving. None of these choices are rules, but testing the overall look before building the frame can prevent the display from feeling disconnected from the room.
It is also worth looking at the wall from the normal viewing distance. A trading card that looks detailed from thirty centimetres away becomes part of a much larger pattern from several metres away. At that distance, the overall grid, frame colour and spacing matter more than individual text or grading labels.
Raw Pokémon trading cards and graded Pokémon trading cards do not need the same visual treatment
Raw Pokémon trading cards often benefit from more traditional framing because matboard can give each trading card a defined visual border without adding much depth. Graded Pokémon trading cards already have a thick clear border and label, so adding heavy matboard around every slab can make the display feel crowded.
This is one reason EVA foam and other recessed inserts work well with slabs. They can hold the rigid holder while keeping the surrounding material visually quiet. A raw-trading-card frame and a slab frame can therefore use completely different construction approaches while still looking like they belong in the same collection room.
If a collector wants to mix raw and graded Pokémon trading cards, one option is to use separate frames with matching outer finishes. That keeps the wall visually consistent without forcing two very different holder depths into one structure.
Planning around future Pokémon trading card upgrades
Pokémon collections rarely stay frozen. A collector may replace a raw trading card with a graded copy, upgrade a grade, change language, or add another artwork of the same Pokémon. A display that only works for one exact collection snapshot can become restrictive.
Before final assembly, think about what is most likely to change. If the collection revolves around one Pokémon, future releases are almost guaranteed. If the display represents a completed vintage run, change may be much slower. The more dynamic the collection, the more valuable removable backing and modular framing become.
Cleaning and maintaining a Pokémon trading card wall display
Maintenance is usually simple, but the wrong cleaning method can damage acrylic faster than normal use. Dust should be removed with a soft microfibre cloth or an acrylic-safe cleaning method rather than harsh glass cleaner. Avoid abrasive cloths and paper towels if the glazing scratches easily.
Check large displays occasionally for movement, especially after relocation or wall vibration. If a slab has started tilting inside an insert, solve the support problem rather than simply pushing it back into place. Also check mounting hardware over time, particularly on very large frames.
The trading cards themselves should not need regular handling. One of the advantages of a good wall display is that the collection can be enjoyed without constantly removing trading cards from their holders.
Photographing a finished Pokémon trading card display
If you plan to photograph the wall for social media or collection records, glare becomes even more obvious than it is to the eye. Turn off direct lights that reflect in the glazing, move the camera slightly off-axis and use softer room lighting where possible.
Large displays often photograph better from farther away with a straight camera position rather than using a wide-angle lens close to the frame. That keeps the grid looking square and gives a better sense of scale.
Common DIY mistakes that are easy to avoid
- Designing around the raw trading card instead of the sleeve, top loader or slab that will actually be displayed.
- Buying the outer frame before checking the depth of the full material stack.
- Assuming PSA, CGC and BGS holders will behave like one universal slab size.
- Cutting every opening before testing one with a real holder.
- Making a graded-card insert so tight that updating the collection becomes a fight.
- Packing a colourful Pokémon collection so densely that the wall becomes visually noisy.
- Ignoring how direct sunlight reaches the wall during the day.
- Choosing wall fixings before knowing the finished weight.
- Sealing the backing in a way that makes future upgrades unnecessarily difficult.
A practical build sequence
- Decide whether the display is for raw, sleeved, top-loaded, magnetic-holder or graded Pokémon trading cards.
- Measure the actual holders you will use.
- Choose the collection theme and rough number of trading cards.
- Mark the proposed frame size on the wall with painter's tape.
- Choose the frame, insert and glazing materials.
- Dry-stack those materials to confirm the required depth.
- Prototype one opening before cutting the full insert.
- Dry-fit the frame and check the grid from a distance.
- Install the collection and close the backing.
- Mount the completed display using hardware suited to the final weight and wall type.
When DIY makes sense and when ready-made starts looking attractive
DIY is a good fit when the project itself sounds enjoyable. If you already own tools, want an unusual layout or are building a smaller display, there is plenty of satisfaction in making the frame yourself.
The calculation changes when the collection becomes large. Custom acrylic, precise foam cutting, stronger backing and heavier mounting hardware can turn a simple frame into a serious fabrication job. At that point a ready-made system may be more appealing, especially if the finished wall matters more to you than the building process.
Choosing between one large Pokémon display and several smaller frames
There is a point where adding more openings to one frame stops being the obvious answer. A single large Pokémon display gives you one uninterrupted grid and can make a collection feel substantial, but it is harder to carry, mount and update. Several smaller frames create visible breaks, yet they are much easier to expand and rearrange.
Think about the collection itself. If the wall is built around one completed theme, such as a fixed evolution line or a defined graded run, a larger single frame can make sense. If the collection is based on a favourite Pokémon that keeps receiving new artwork, modular frames are usually more forgiving.
There is also a practical room issue. A very wide frame may fit the wall but not the route to the wall. Doorways, stairs and narrow hallways are worth checking before a large build becomes impossible to move safely.
How to handle mixed PSA, CGC and BGS Pokémon collections
Mixed grading companies are common in real collections, especially when the priority is owning the trading card rather than keeping every slab visually identical. The challenge is that the slabs can differ in overall shape, thickness and label proportions.
You have three sensible options. The first is to use separate frames for each grading company. The second is to group different slabs into their own rows or zones within one display. The third is to accept the variation and make the collection itself the focus.
What usually looks worst is pretending the holders are identical when they clearly are not. A deliberate mixed-slab layout can look great. An almost-uniform grid with a few holders sitting differently tends to look like an error.
Displaying vintage Pokémon trading cards beside modern artwork
Vintage Pokémon trading cards and modern illustration-heavy releases create a strong contrast. Older trading cards often have more restrained borders and smaller artwork windows, while modern cards can use the entire surface for illustration and texture.
A neutral frame helps bridge those eras. If the surrounding materials are too themed around one generation, the other half of the collection can feel out of place. Black, white, natural timber or a simple metal finish gives both styles room to work.
If you are framing raw vintage trading cards, be especially careful about direct contact and adhesives. The display should support the trading card through a sleeve, holder or properly planned mat rather than sticking anything to the card itself.
Planning a Pokémon display that still looks good when some spaces change
One overlooked problem with large themed walls is that the collection rarely stays perfectly static. A slab gets upgraded, a favourite artwork changes, or one trading card is sold. If the entire visual balance depends on one exact arrangement, every small change creates more work.
A grid with a clear structure is more forgiving. You can replace one trading card without changing the overall design language. This is another reason not to make every opening a different colour or shape. Consistency gives the collection room to evolve.
If you know one section will change often, put that section somewhere easy to access rather than burying it in the middle of a difficult backing system.
What matters most when you stand back from the wall
From close range, collectors notice centring, labels, foil texture and individual artwork. From across the room, the display reads very differently. It becomes a pattern of colour, dark and light areas, frame proportions and repeated holders.
This is why full-scale mock-ups are useful. The perfect layout on a desk can feel too tight once it occupies a large wall. Step back regularly while planning. If the frame only looks good from thirty centimetres away, it is not yet working as a wall display.
How to make your own Pokémon trading card frame at home
A simple homemade Pokémon trading card frame can start with a locally sourced picture frame, matboard or EVA foam, acrylic or glass, and a removable backing. The exact method depends on whether you are displaying raw trading cards, sleeves, top loaders or slabs.
For a cheap DIY Pokémon trading card display, keep the build small and simple. For a premium version, spend more on accurate cutting, better glazing, stronger backing and a cleaner outer frame rather than adding unnecessary decoration.
Frequently asked questions
Can Pokémon trading cards be framed without damaging them?
Yes. The important points are avoiding direct adhesive contact, supporting the trading card or holder correctly, controlling sunlight and making sure the display can be reopened.
Is acrylic or glass better for Pokémon trading card displays?
Both can work. Acrylic is lighter and safer for large displays, while glass is more scratch resistant. The display size and wall location usually decide the better option.
Can PSA and CGC Pokémon trading cards go in the same frame?
They can, but their holder dimensions and label proportions may differ. A mixed-slab display needs to be planned around the actual holders rather than assuming one opening fits everything.
Is EVA foam suitable for graded Pokémon trading cards?
EVA foam can work very well around rigid holders when the density, thickness and cut fit are appropriate. The slab should be supported snugly without excessive force.
How do you make a cheap Pokémon trading card wall display?
Start with a locally available frame, basic acrylic, matboard or foam board and a small layout. Keep the project simple and spend money on accurate cuts and secure wall mounting.
Should Pokémon trading cards be displayed in direct sunlight?
No. Even with UV-resistant glazing, prolonged direct sunlight is best avoided.
Final thoughts
A good Pokémon trading card wall display does not need a secret formula. It needs sensible decisions in the right order: choose the holder, plan the layout, choose materials that suit the scale, control light exposure, keep the display serviceable and mount it properly. If the project starts becoming more complicated than you want, that is also useful information. DIY is one option; a ready-made display is another.
Continue Exploring
If you enjoyed this guide, you may also find these collector resources helpful.
📚 Collector Guides
-
Best Trading Cards to Display & Collect
Explore Pokémon, MTG, Yu-Gi-Oh!, Sports Cards, One Piece and Disney Lorcana cards, sets, rarities and collection ideas. -
The Ultimate Trading Card Display Guide
Explore trading card wall displays, frames, shelves, layouts and display solutions for collections of every size. -
How to Display Graded Cards on a Wall
Learn how collectors display PSA, BGS and CGC graded cards using wall-mounted trading card displays.
🛒 Shop Display Collections
-
Aluminium Trading Card Wall Display Frames
Premium aluminium trading card display frames available in a wide range of grid sizes, frame colours and holder formats. -
PSA, CGC & BGS Graded Slab Wall Display Frames
Purpose-built graded trading card display frames for Pokémon, MTG, Yu-Gi-Oh!, One Piece, Sports Cards, Disney Lorcana and other collections. -
One Touch Wall Display Frames
Premium aluminium wall display frames designed for One Touch magnetic trading card holders.

0 comments